The most common cause of a “broken” heater has nothing to do with the unit itself — it’s the power supply. Start there, then work through submersion and placement, before running an isolated bucket test to confirm whether the heating element has actually failed. Confirm any suspected fault with an independent thermometer first, since a heater’s own dial or display isn’t a reliable thermometer. If the bucket test confirms a real failure, the safe next step is a proper shutdown, not a quick swap while it’s still hot.
Before you start: confirm there’s actually a problem
A heater’s own dial or display isn’t a thermometer, and it can disagree with the water’s actual temperature well before it’s genuinely failed. Check the tank with a separate, independent thermometer first — see our best aquarium thermometers guide if you don’t have one — before assuming the heater itself is at fault. If the independent reading confirms the tank really is off-temperature, work through the checks below in order.
1. Check the power supply
This is the single most common cause and the easiest to rule out. Confirm the heater is fully plugged in, check the cord for visible damage, and test the outlet itself by plugging in something else (a phone charger works fine) — if that doesn’t power on either, the outlet or a tripped GFCI breaker is the problem, not the heater. If your setup uses a power strip or timer, confirm that’s switched on too.
2. Check the water level and submersion
Most heaters need to sit fully submerged to the manufacturer’s marked water line to heat safely and accurately; evaporation between water changes can drop the level enough to partially expose the heating element. A partially exposed heater can both fail to heat properly and pose a genuine safety risk (see the safety note on removal below) — top off the water if it’s low, and recheck.
3. Check placement and circulation
A heater in a dead zone with poor water flow can cause the thermostat to sense the water around it as warmer (or cooler) than the tank as a whole actually is, leading to uneven heating that shows up as a “not working” complaint even though the unit itself is fine. Position it near your filter’s outflow so warmed water circulates rather than pooling around the heater itself, and clear away decor or substrate that’s blocking flow around it.
4. Double-check the thermostat setting
It sounds obvious, but a dial bumped during a water change or décor rearrange is a genuinely common cause. Confirm the set temperature is actually where you think it is, and if your model has a calibration adjustment, check it against your independent thermometer reading — a consistent offset (the heater always reads a couple of degrees off in the same direction) usually means it needs recalibrating, not replacing.
5. Isolate the heater with a bucket test
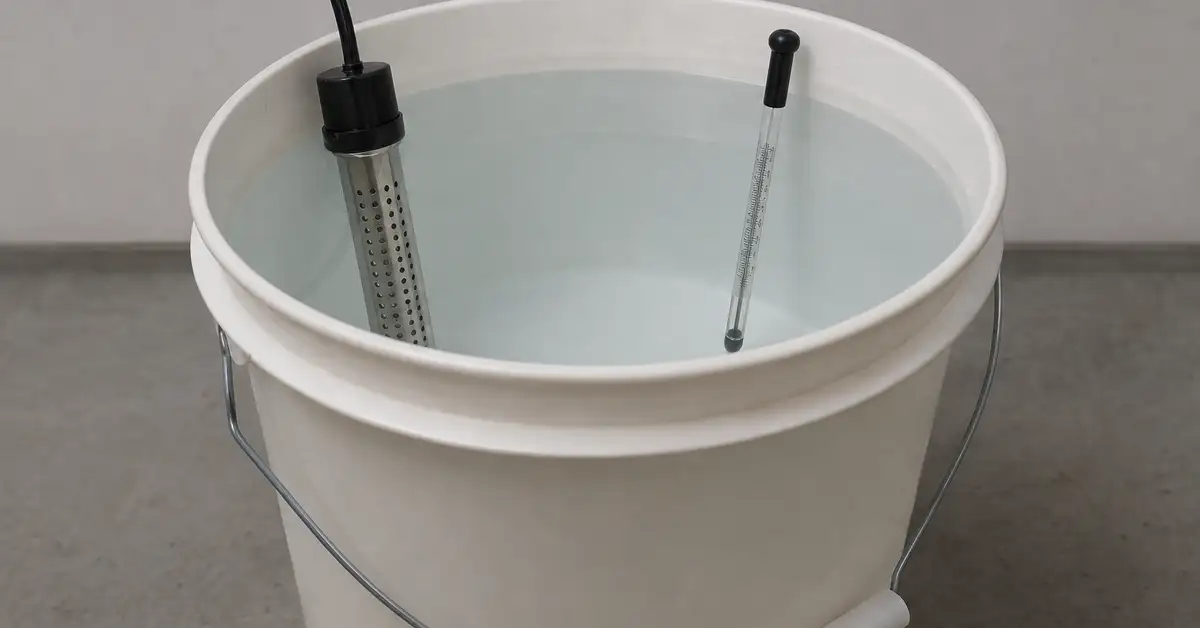
If the checks above don’t explain the problem, isolate the heater itself: fill a clean bucket with room-temperature water, fully submerge the heater to its marked line, add a separate thermometer, and set the thermostat a few degrees above the water’s starting temperature. Check back in 30–60 minutes. If the water temperature hasn’t risen at all, the heating element itself has failed and the unit needs replacing — not just recalibrating.
6. Work out which direction it’s failing
This distinction matters for urgency. A heater that’s stuck off (won’t heat at all, or the tank is steadily cooling) is a comfort and stress problem you can address on a normal timescale. A heater that’s stuck on (the tank keeps climbing past your set temperature, or the bucket test showed it heating without ever cutting off) is a genuine emergency — unplug it immediately. Our best aquarium heaters guide covers this failure-mode distinction and why a stuck-on heater is the more dangerous of the two.
7. Remove a confirmed-faulty heater safely
Never pull a heater straight from the tank while it’s still hot: unplug it and let it cool for at least 30 minutes first. Removing a hot heater risks a burn, and the sudden temperature change from hot-to-air can crack or shatter the glass or casing. The same 30-minute rule applies in reverse when installing a replacement — let a new heater sit submerged and unplugged for a while before switching it on, so it acclimates gradually rather than facing thermal shock.
8. Reduce the chance of it happening again
A single point of failure is the underlying issue behind most heater scares. Pairing your heater with an independent thermometer (so you catch drift early) and, for higher-stakes tanks, an external controller like the Inkbird ITC-308 we cover in our heaters guide adds a genuinely independent safety layer — both the heater’s own thermostat and the controller would need to fail before the tank is at real risk. On larger tanks, splitting your total wattage across two smaller heaters is another way to avoid a single failure taking the whole tank down at once.
Frequently Asked Questions
General information only — not electrical-safety advice. Always follow manufacturer instructions, use a grounded outlet with GFCI protection where required by local code, and consult a qualified professional for electrical questions you’re unsure about.
Sources: Aqueon: Fish Tank Heater Tips for Cold Weather · Why Is My Aqueon Aquarium Heater Not Working Properly? · CoOSpider: Why Your Aquarium Heater Isn’t Heating · Aquarium Life HQ: Aquarium Heater Troubleshooting · hygger: How Do I Know if My Aquarium Heater Is Working?